
How to reduce video file size without losing quality?


Here’s are video compressor tools that are available today to help you reduce your video file sizes.
- VLC (Windows, Mac, Linux)
- Shotcut (Windows, Mac, Linux)
- QuickTime Player (Mac)
- VEED.IO (Web)
- VideoSmaller (Web)
- Clipchamp (Web)
1. VLC (Windows, Mac, Linux)
As one of the most popular media-viewing and -editing apps around, it’s no surprise that VLC is a great choice for making video files smaller.
First, download VLC (Windows, Mac, and Linux versions are available). After it’s done installing, click Media > Convert/Save (Or by using the cmd+shift+S keyboard shortcut).
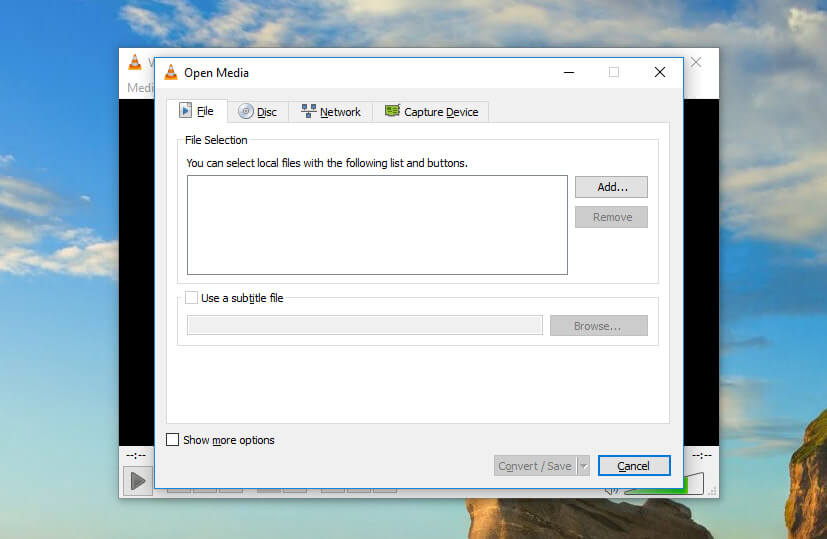
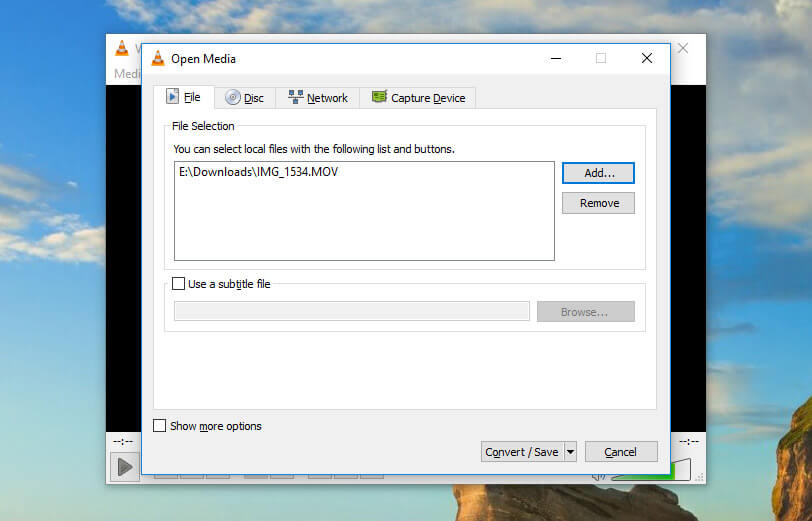
Then click Add and select your video file (you can also select multiple files to convert them as a batch).
Click Convert/Save to bring up conversion options. In the Profile dropdown, you’ll need to select the type of conversion that you want.
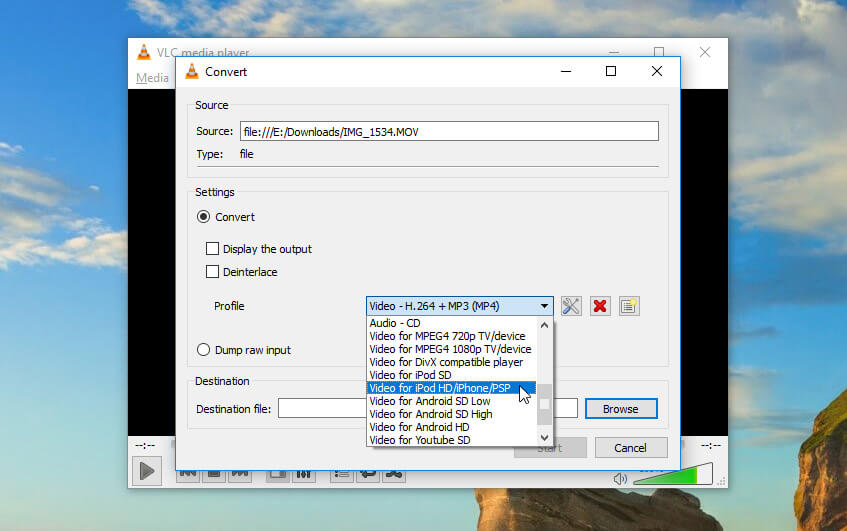
Because VLC doesn’t display estimated file sizes, you’ll need to guess at which level of conversion to apply. Fortunately, VLC has recommendations for different types of videos.
For example, if you’re uploading to YouTube, you probably want to retain high quality. Just select Video for YouTube HD. Think people will be watching your video on a TV? Use Video for MPEG4 1080p TV/device. Want something smaller? Try Video for MPEG4 720p TV/device. Optimizing for Android, iPod, or iPhone will also get you smaller video files.
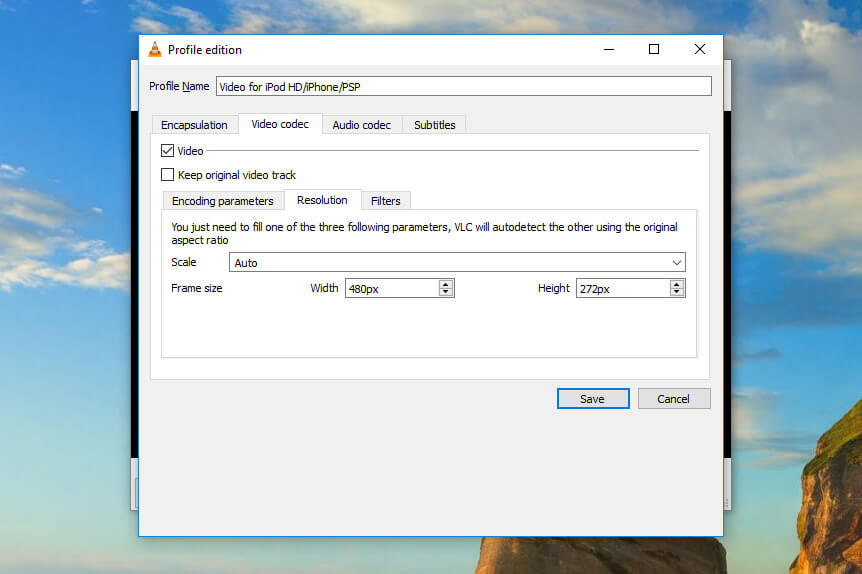
To further reduce your video file size, you can change the resolution of the video. Click the Settings button (it looks like a wrench and a screwdriver) to the right of the Profile dropdown, then select the Resolution tab.
From there, you can adjust the scale to retain your current proportion, or manually adjust the size of the video.
When you’re done, click Save. You’ll need to enter a destination location and filename—click Browse to specify them.
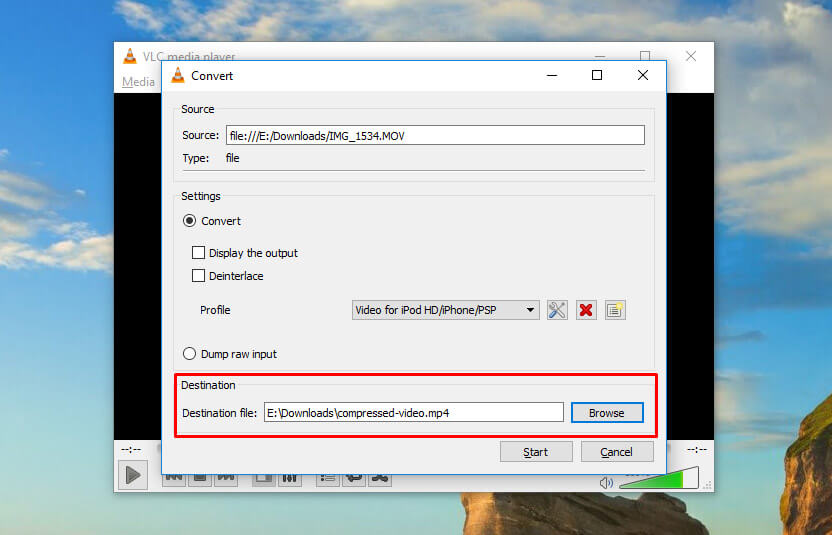
Once you’ve done that, just hit Start.
If you’re compressing a large video, it might take some time. But when it’s done, you’ll have a new video file that should take up a lot less space.
2. Shotcut (Windows, Mac, Linux)
While not as popular as VLC, Shotcut is another common choice for people looking to make videos smaller without spending a dime. Intended more as an editor than a viewer, Shotcut gives you a lot of advanced functionality for editing your videos.
It’s not immediately clear how to compress video files with Shotcut, so we’ll walk you through it.
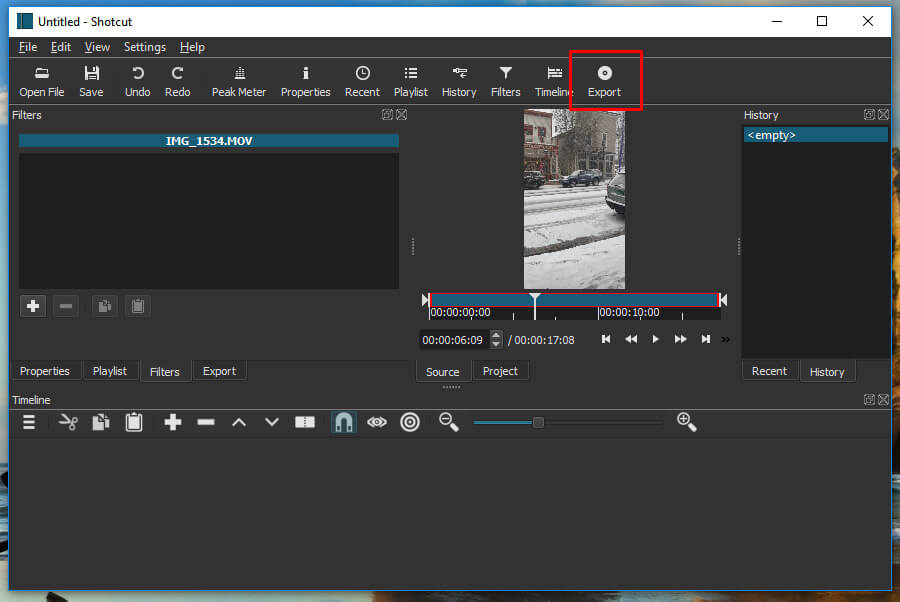
Download Shotcut, then open it and use the Open File button to open your video.
To export it in a new file format, click Export in the top-right corner of the window.
You’ll be presented with a huge list of options.
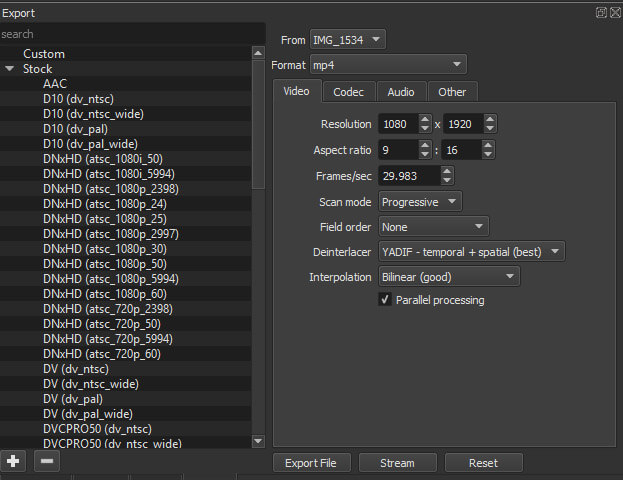
In general, using H.264 Baseline Profile is a good choice. This format will likely reduce the size of your video without sacrificing too much quality.
As you’ll see, there are plenty of other options for compression. Feel free to try some of them out to see how small they get your file. In general, the H.264 baseline will be your best bet.
You can also adjust the size of the video by changing either the Resolution or Aspect ratio fields.
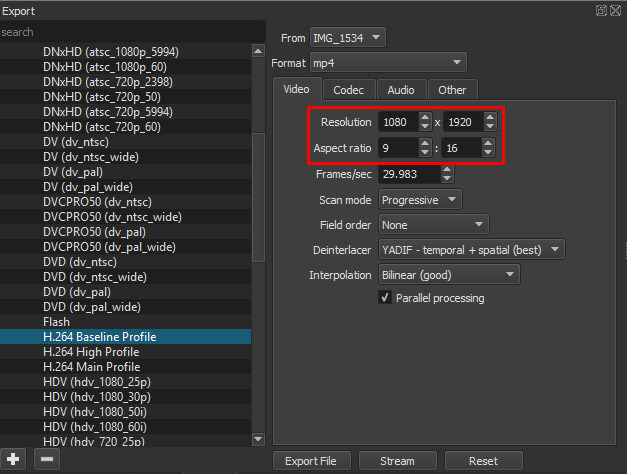
However, it’s important to know that Shotcut won’t automatically adjust the corresponding option for you. If you change the horizontal resolution, you’ll need to calculate the proper vertical resolution to make sure you don’t end up with a pinched video.
Choosing a lower-quality output will automatically adjust the resolution for you. So if you select HDV (hdv_720_25p), the resolution will decrease if your video was originally in 1080p. But if you want to go smaller than the preset resolution, you’ll need to calculate the correct dimensions yourself.
You can also use the export window to customize exporting options to get exactly the type of file you want. This is best left to expert users, though you can certainly play around with it to see what happens.
3. QuickTime Player (Mac)
Apple’s default media player actually includes a number of great options for making your videos smaller. The only drawback to it is that you can’t use it on any other operating systems.
To make a video smaller with QuickTime, open the app from your Applications folder and click File > Open File to load your video.
To begin making your video smaller, click File > Export As. Unfortunately, QuickTime doesn’t give you as many options as some other apps. You’ll see 4k (if applicable), 1080p, 720p, and 480p options.
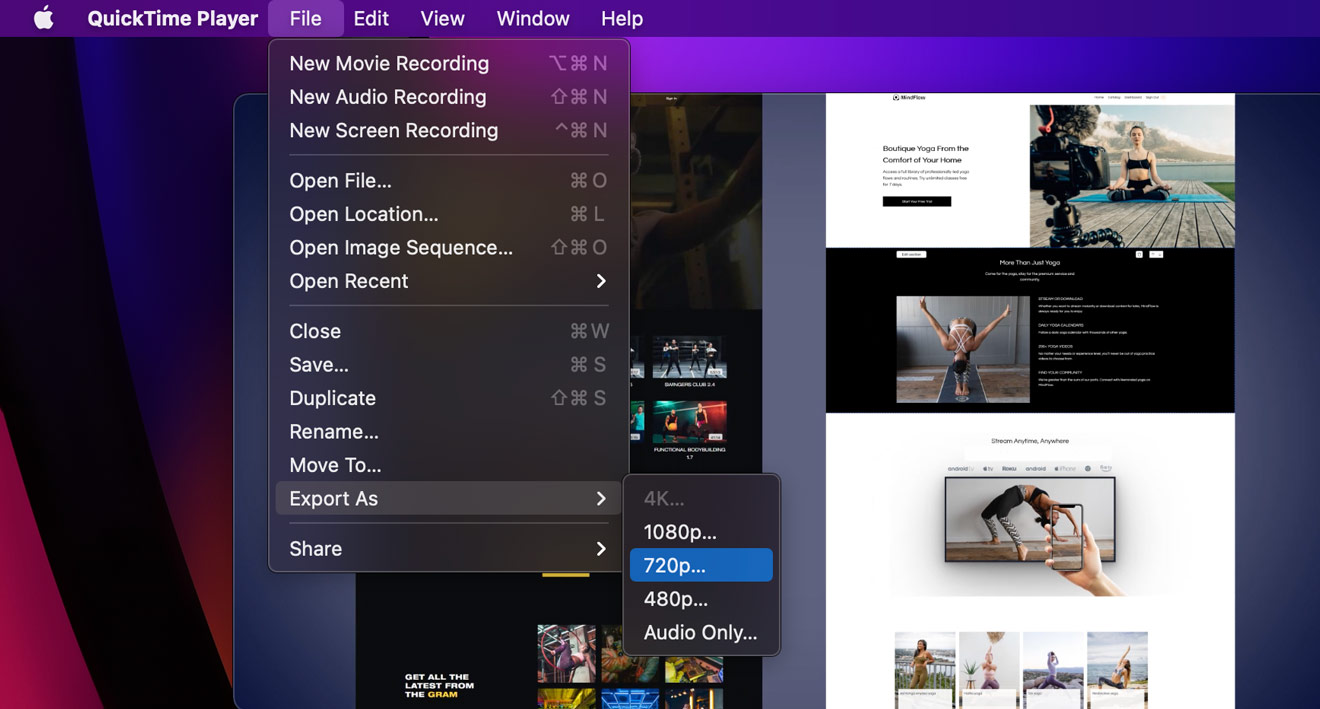
Select 720p or 480p (assuming you recorded in 1080) and export your file. It should be smaller than when you started.
Unfortunately, QuickTime doesn’t support resizing, so if you need to reduce the dimensions of your video, you’ll need to use another program, or use a web-based video compression tool such as VEED, ClipChamp, or Kapwing (More on this below).


Your Answer